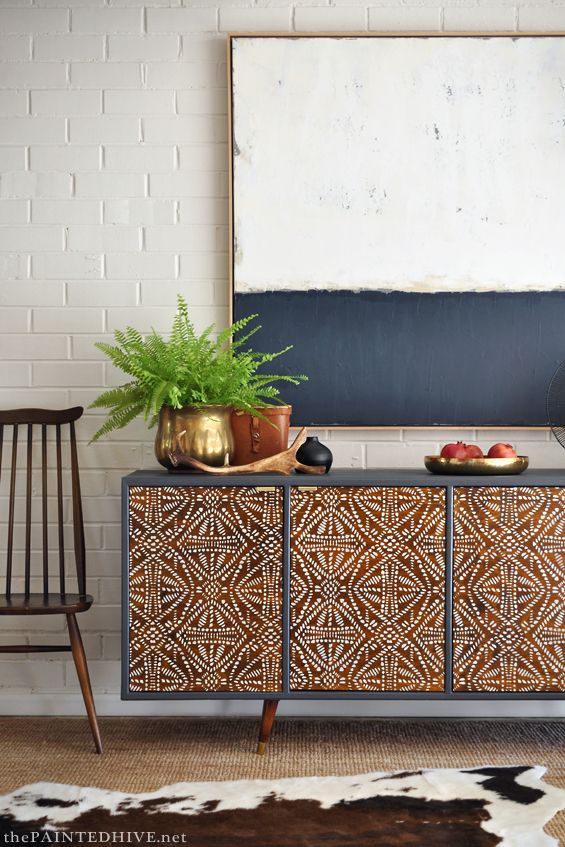
1. A BOHO MAKEOVER
The Painted Hive is a goldmine of refurbished furniture projects. Their face lifts are dramatic with the after bearing no semblance to its before counterpart. But, this one is my favorite of all their projects. As you can see the chest of drawers not only got a fresh coat of paint, but the elevation details are mind blowing.
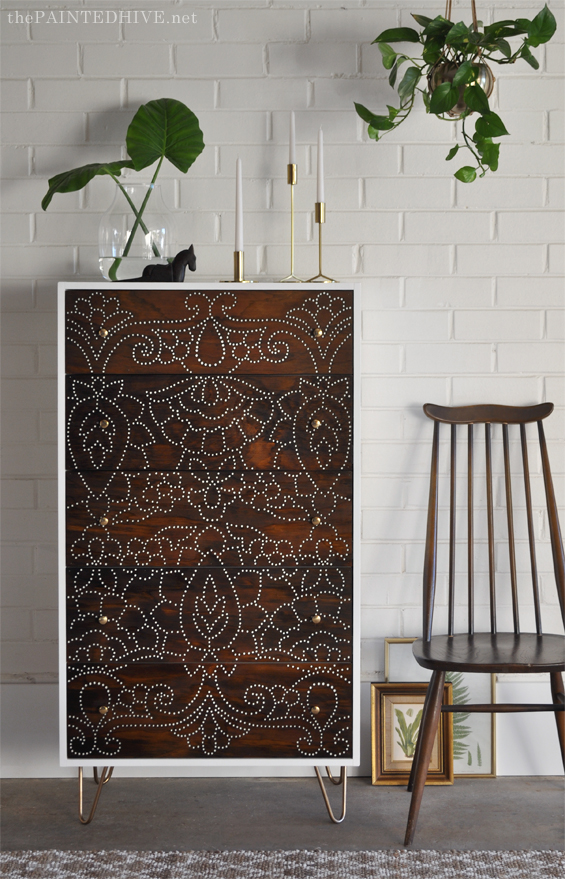
2. INLAY INTRICACIES

Yet another project from the Painted Hive that promises to leave you spellbound.
3. LET THE LINES INTERSECT

Source: unknown
The intersection of triangles in an array of blues makes for a scintillating transformation of this dresser. I couldn’t find more details of this project. But, it is clear from a comparison of the before-after that the renovator went to great lengths to add legs leaving no traces of its humble, drab past. Retaining stains of wood was a clever thing to do. the modern appeal comes from the geometric patterns.
If you are not great at drawing free hand, like me, stick to geometric patterns. These are easy to achieve and require little skill. All you need is good tape to cover the areas so that the areas you are filling with one color does not bleed into the adjacent areas.
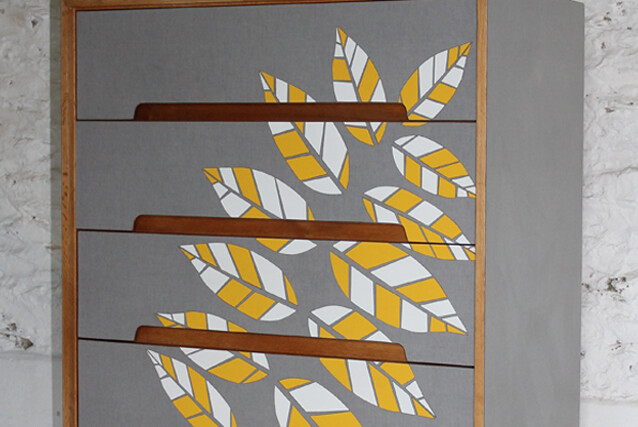
4. TRY FREEHAND SKETCHING
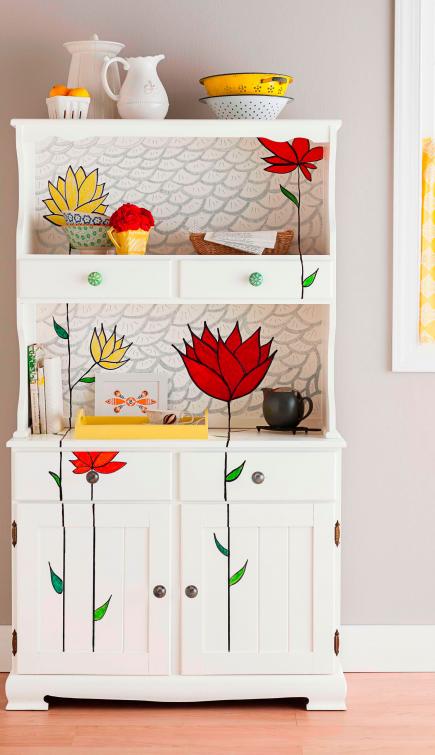
I couldn’t find the before picture for this one. Seeing this cabinet in its earlier avatar would have truly elevated its present beauty to another level. I’ve had this picture saved on my Instagram feed for months now making a mental note if I ever paint a cabinet, I would refer to this one. Now, when the day has come, my hands are trembling. But, for those of you who are good at free hand, do give this one a try. It’s a stunner for many reasons: the perfect white backdrop makes the vivid flowers and leaves stand out.
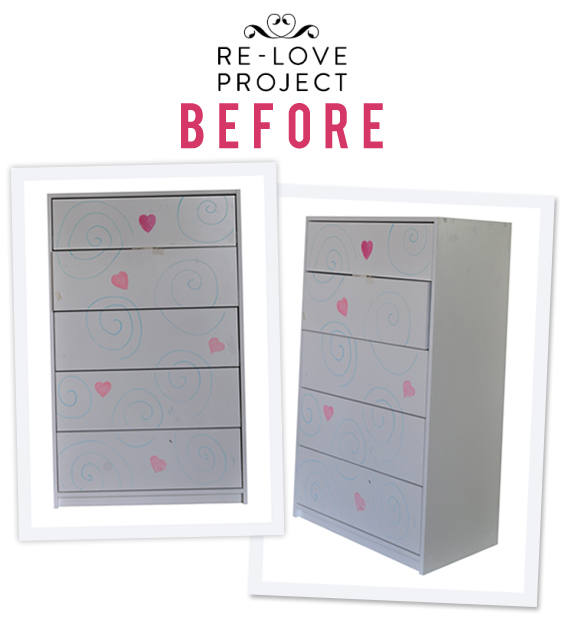
5. NEON FOR DRAMATIC EFFECT

Every room deserves one accent piece in that eye-popping colour. When done right, it can be a winner. This makeover project on How to Nest for Less demonstrates that neons need not be an intimidating choice. Infact, the flash of pink adds a nice feminine touch to the dull IKEA dresser. By replacing the knobs with fancy pulls that look like drop earrings, it reinforces the feminine touch. Love it.
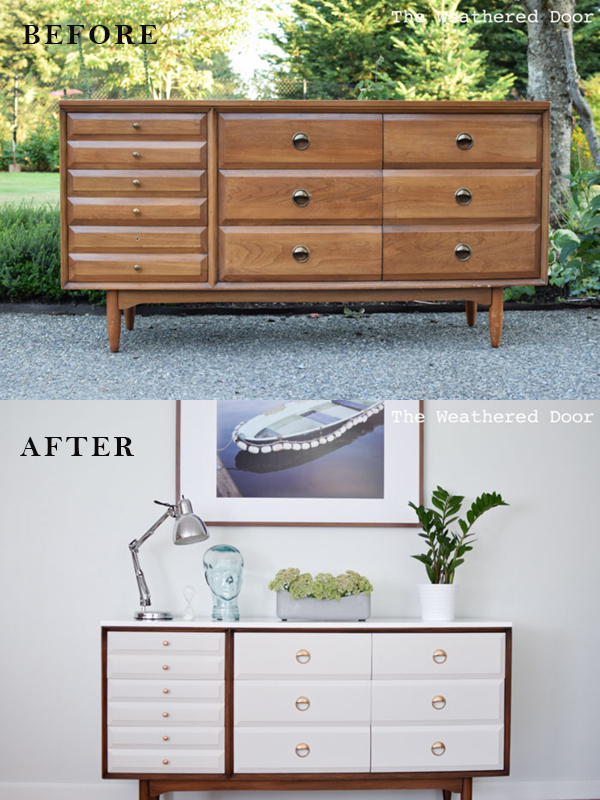
6. A GEOMETRIC MAKEOVER

Like The Painted Hive, The Weathered Door is another great resource for ideas to refurbish furniture. What I like about this piece is the appreciation of the wood stains. When you are working elm, teak, or oak, it would be wonderful to show of the original stains of these great quality wood. After all, we are not talking about laminate or ply here. By bringing in hints of completing colors, while retaining a majority of the original wood color, the transformation is nothing short of brilliant.
7. KEEP IT SIMPLE
This is another exemplary illustration of how to keep it simple from The Weathered Door. The one thing I notice often is white is a preferred color for repainting furniture, perhaps because it is safe with less room for going wrong. In this case, too, there are no enhancements to the structure or the hardware. By painting the front face in white, the after ensures it bears no resemblance to its previous version.
8. HAND SKETCH

 This piece hits closer home because this is the colour I had shortlisted at the paint shop. But I doubted if the blue would do it, or if I needed another colour to offset the monotony. a few ideas I was toying with where some hand written notes on the top, decal, geometric patterns, or decoupage of posters on the sides. But the simplicity of what Gilly of Colour Saturated Life has done to this dresser convinces me to go with a decal. The talented Gilly free handed the patterns to make it a stunner. I will, however, buy a simple wall decal, and emboss the design on the top.
Here is another pattern you may like.