
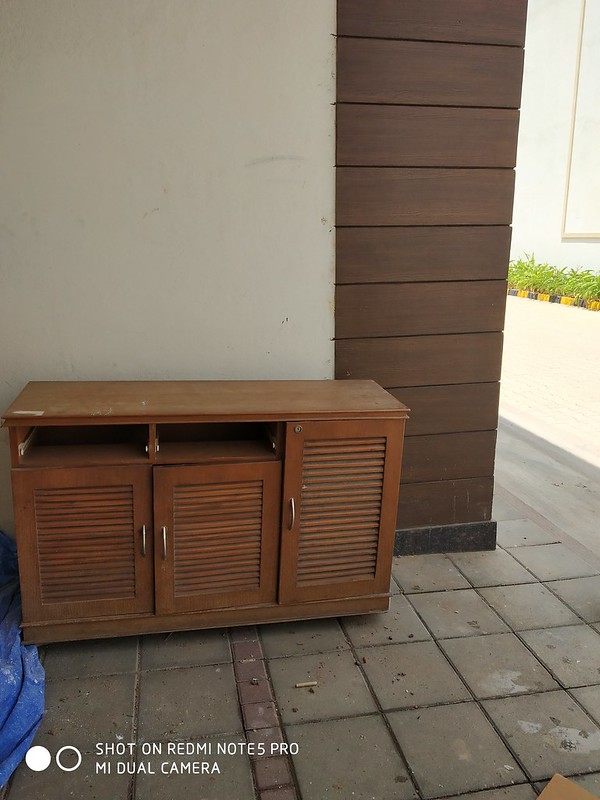
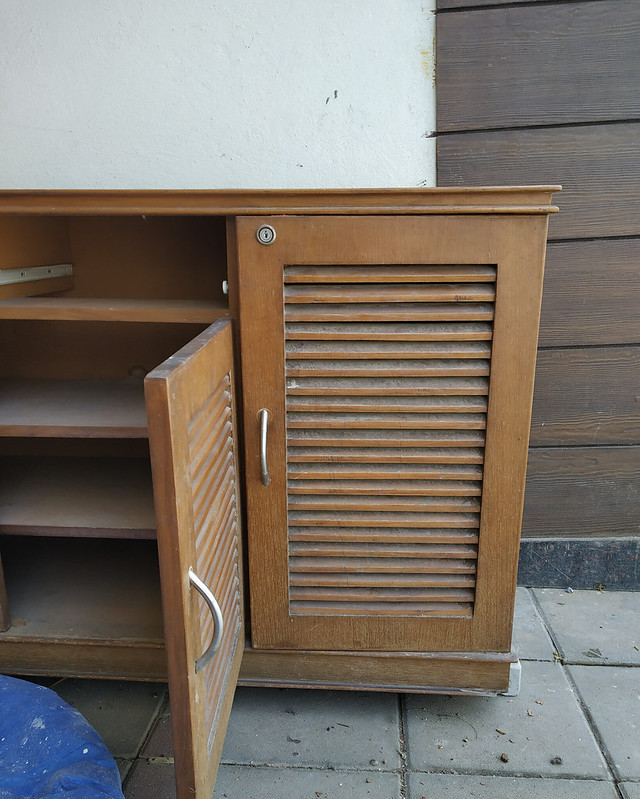
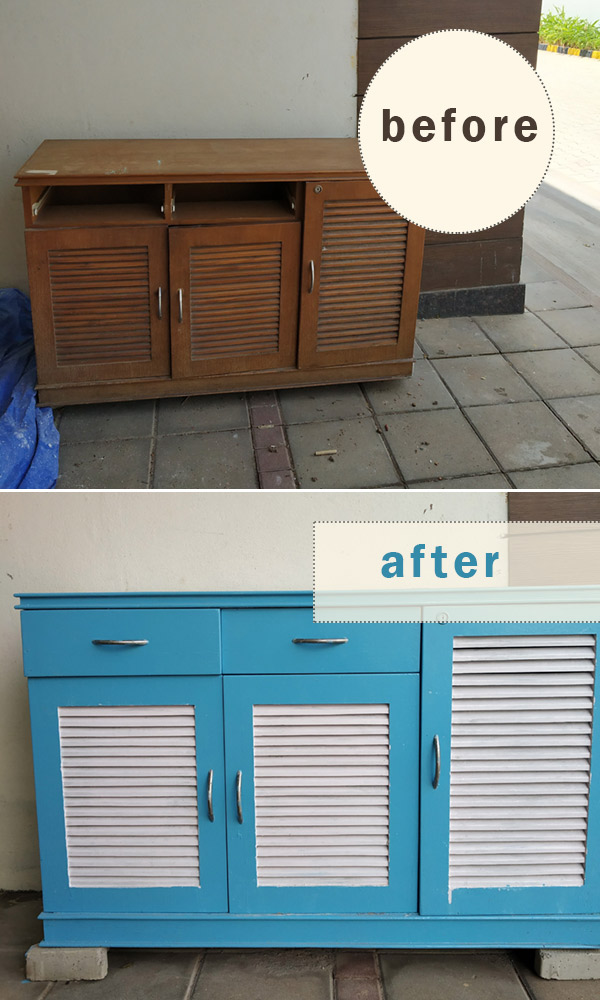
We bought this wooden cabinet as a multipurpose storage unit to store footwear, newspaper, and odd hardware tools. This was one of our first purchases after we moved into our first home. To be honest, I had zero understanding of decorating, interior styling, or what to buy for what. If there was a dire need, we bought that piece of furniture so long it fulfilled its function and our not-so-deep pockets. Form had not entered our lexicon. So, yes, our home was a concoction of disparate elements from tan sofa to geometric tiles.
But, you hold some things dear, when they are reminiscent of good ole memories of your first home. So, this piece came with us despite our best efforts to sell it on Quikr. Make no mistake, it got sold two times, and both times it was returned and money refunded to the buyer due to a technical glitch. So, I take it that it is destined to stay with us. It sat pretty (or ugly) in the garage holding the husband’s auto supplies. Oh yes, he has a truckload cabinet full of wax, shampoo, metal paste and other paraphernalia. And my paint cans take up the rest.
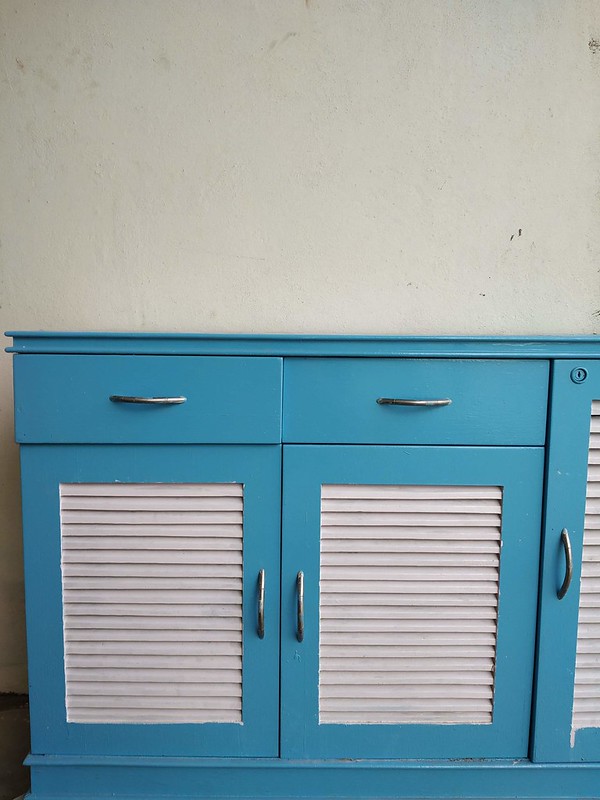
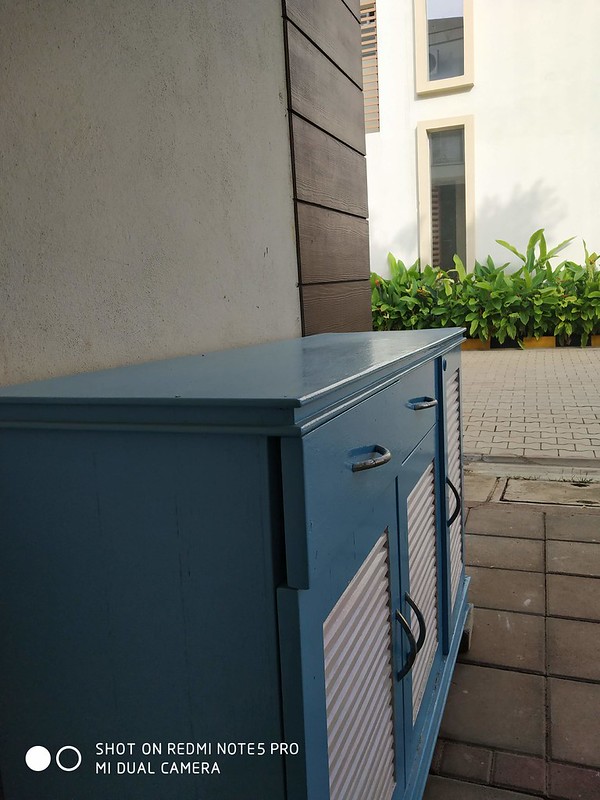
No doubt, it was an eyesore at the entrance of the house. I decided to give it a face lift by painting it in sea green. But, the week I had scheduled for painting, life as we know it happened – it was like opening a can of worms. So I grabbed the closest color I could get at the nearest paint shop and completed the project.
THE TOTAL COST OF THE PROJECT
Sample white paint – 2 cans – Rs 60
1 liter blue enamel paint – Rs. 250
Brush: Rs 50
Thinner: Rs 80
4 sheets of decoupage paper – Rs 75
1 decoupage matt medium – Rs 140
Wood primer: had at home
Sand paper, tarpaulin, old rags, and paint roller brush: whatever I had at home.
Total cost: Rs 655
I reckon sea green would have given it that natural vintage touch. Maybe be this one will age better, if not I will have to distress it a bit on the sides.
STEPS
- Cover the surface with a tarpaulin to protect the floor from color.
- Clean the cabinet with an old cloth.
- Sand the surfaces smooth. This is the laborious part of the job.
- Apply one coat of wood primer. You will need 1 liter for this.
- Let it dry for two days.
- Sand again, but not too with a rough one this time.
- Thin the enamel paint with thinner and apply one coat of paint. Let it dry.
- Apply one more coat after 3-4 days once it is completely dry. I let it stay for a week.
- For decoupage, apply the matt medium on the surface. It resembles fevicol.
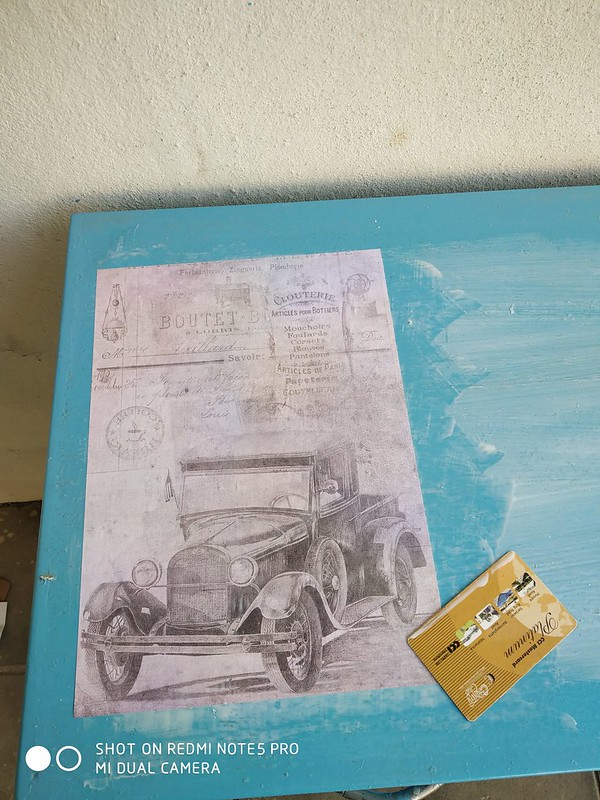
- Paste the decoupage paper on the surface where you applied the medium and smooth it with a used credit card. This will ensure there are no air bubbles trapped and no wrinkles.
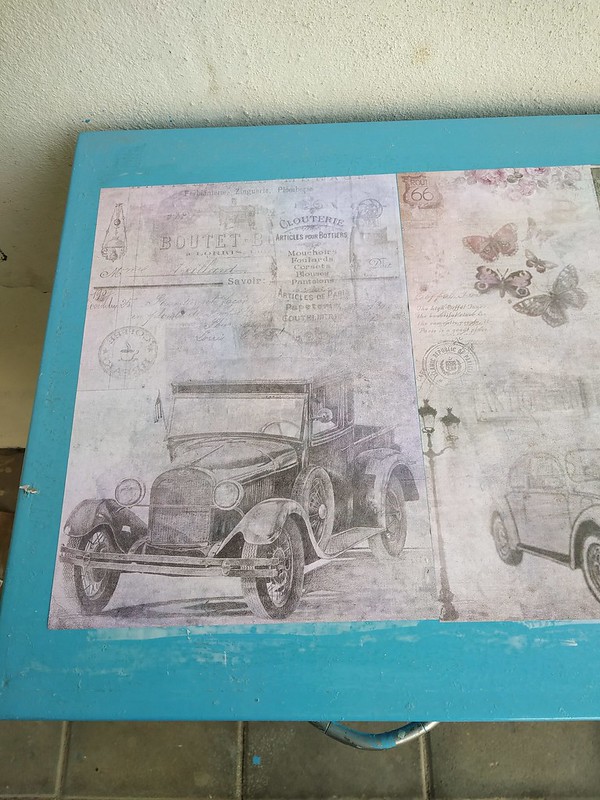
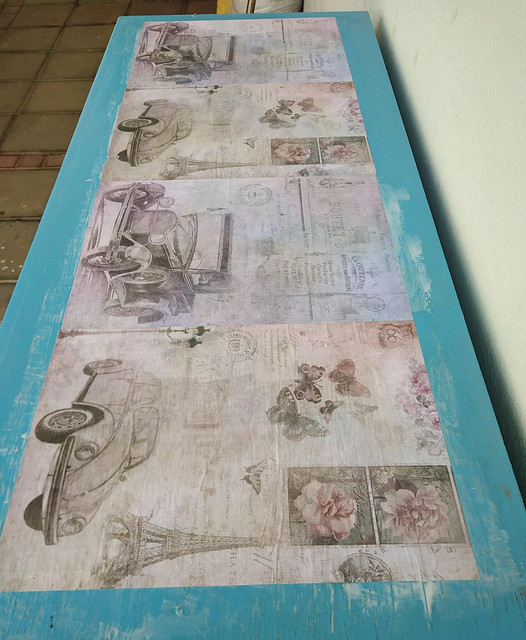
- Repeat the process with other sheets.
- Seal the top layer of the decoupage paper with the medium after 2-3 days. And you’re done.
The steps are illustrated through pictures below:

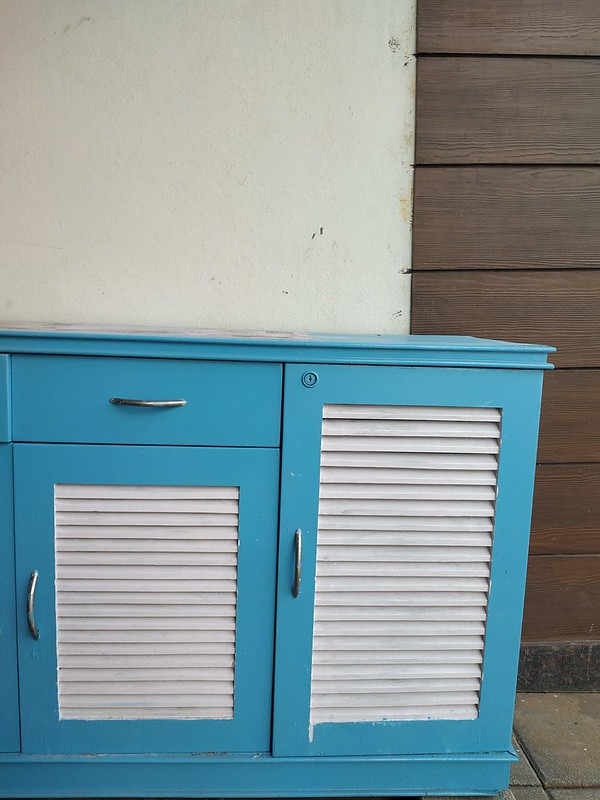

I would like to stencil a motif on the sides of the cabinet sometime later.
5 Comments
This is lovely! Where do you get your decoupage material from? Most sources I’ve seen are randomly expensive :(
Thank you. Agree to the cost bit. I was lucky to find it at this price at an ItsyBitsy store.
Great way of using old cabinet furniture into new. I love the way you describe cost of items. great example of diy furniture.
‘wow..I was just looking for this information. I have a similar old shoe rack and have tried hard to get rid off. I have been thinking of giving it a new look, for my 6yr to use it as little book cabinet. Thanks a lot for this write up. It is really helpful.
Thanks Sonali. I’m glad you found it useful. would love to see the pictures after you are done :)