Tag

DIY

Browsing

You know this is the busiest time of the year for paint companies with chock-a-block calendar? This is when most people give their walls a fresh lease of paint before the festive and wedding season begins. The most popular posts on this blog – on Asian Paints and Surprise your Spouse have been trending for the past two months.

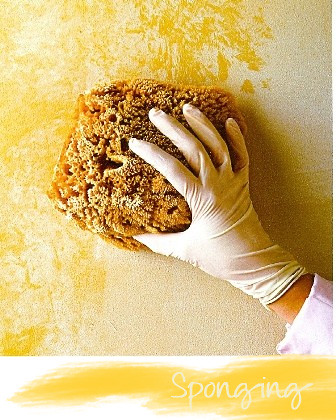
A special effects (textured paint) on a ~ 100 sq. ft wall can cost upwards of INR 5,000. But, you don’t have to spend a fortune if you are proud of your DIY and not too worried about a professional finish. Sponging, combing, brushing, dapple, ragging, weaving, spatula and crinkle are some of the special effects on offer.

The intent of this post is to show that you can do it yourself at home.  For steps on how to do it, this is a great starting point. If you’ve never done a painting job before, I’d suggest you get started with these handy tips.

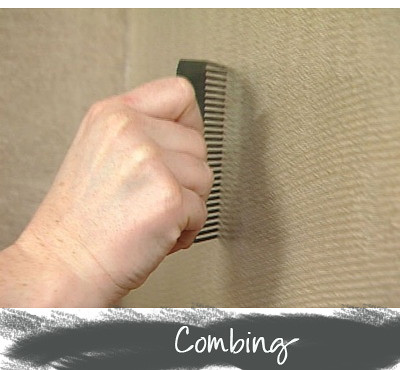
For all the textured effects, choose a base color and another foreground one that stands out as you can see below.

See, how easy it is?  How touch can stretching a comb over wet paint be especially if it leads to a stunning visual effect?

How are you doing this morning? Feeling happy? Great. If you are feeling grumpy, don’t worry. Just go on, take a few minutes off, leave your grumpiness aside to pick up later and read this post. Before I begin, I want to ask you, are you good at sketching and free-hand drawing? Yes ? Well, then you have my profound admiration. No? Great, I’m glad I found another partner (my best effort only went this far). I can neither draw nor get my curves right ever on paper. So, drawing on the wall is a far fetched dream. But, you know what, I found a brilliant idea for folks like us during my recent vacation to Goa. In the club house of the resort where we stayed, there was this colorful pattern all over the walls. On closer look, it appeared easy to replicate. I know we’ll know the outcome…

A quick question: where are you reading this post from – your home office, work or slouching on the couch with your laptop?  Would you believe if I told you that I do most of the work from my dining table ? That’s right. Got to get my own reading corner in the house, so I was just thinking of some simple ideas. And, one seemed perfect. There’s a small L shaped corner in the extra bedroom that fits in perfectly for the purpose. But, before I go there, I would like to ask you what’s the one thing you love the most about this picture  (sorry folks, the white dishes don’t count for an answer)? I know I know, I too LOVE them – anything white for that matter! I like the floating shelves in natural wood. And I think this will work best above my desk – two…

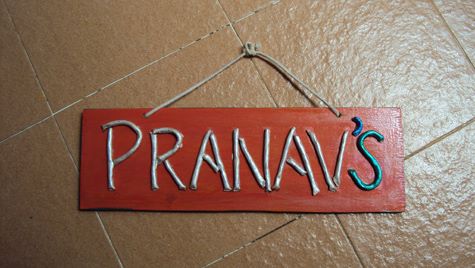
Shall we wrap up the week with a easy but useful DIY? There are scores of small online stores that make nameplates. And then there are some of the brick-and-mortar stores I’ve featured in the past like Confluence which also specialise in this area. The ceramic ones are a rage all over and one can spot them in many malls, or you can make your won by buying just the individual letters in places like Mother Earth.

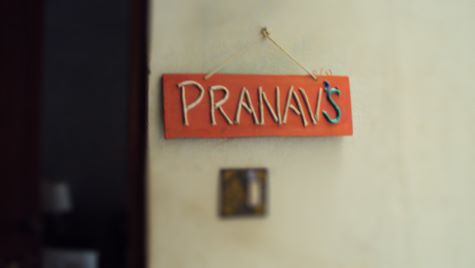
But, we wanted to make it ourselves and we did. Again on a Friday evening ;) It took us about 2 hours to make it from scratch to finish. So, if you can spare two hours this weekend, you could make one too.

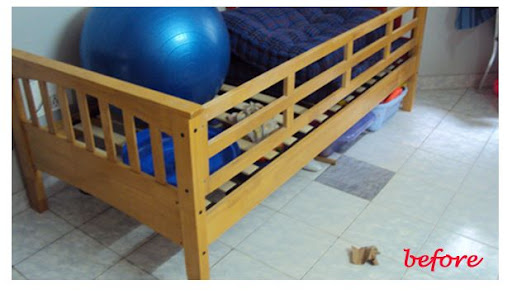
One evening last month, while searching for a sofa for our living room, I happened to go to the @ home store in Marathahalli with my son. When we moved from the Living section to the Bedroom section, his eyes caught a colorful red-and-orange colored bunker with a nice set of wheels and ladder. To be honest, even I loved it. He insisted on getting it home, and in the heat of the moment, I promised to paint his bed in the same color scheme. He immediately agreed and we got home. The episode was forgotten. A week passed and I made no effort on keeping my promise (quite unlike me). He gently reminded me one afternoon after returning from school that his bed still had no wheels or, yellow and red color. It was time to get acting. I made a mental note to get the required colors before…

Do we have any diligent readers (read: obsessively checking Google Reader for new posts) of Apartment Therapy here? If yes, you would know that a good chunk of posts are about restoring or transforming old furniture through painting and replacing the hardware. Images of antique, worn wooden cabinet/dresser/table painted into white or turquoise blue are swimming in my head now.

For me, when it comes to home renovation,  there is nothing more satisfying than giving a face lift to old furniture. To discard the old and buy new stuff is easy work, don’t you think? There are a few odd pieces of furniture in every house such as a chair, cabinet, side table that look aged.  A polish or a new coat of paint will do them good. I want to get started off with a old cabinet first.  It’s about six years old and in good working condition. It has lost its sheen so I’m toying with the idea of retaining its natural finish with a coat of lacquer or doing something radical like painting it in a bold color combination of white-lime green or white-turquoise blue.

I’ve been looking around for ideas and there are quite a few interesting ones that I would like to share.

For a ethnic, Indian theme, bright colors such as fuchsia, red or violet are a good choice to complete the look. However, if you have a monochromatic or minimalistic theme, a single of furniture in a dashing color will look out of place. In the picture below, for instance, Kishani Perera has used a good mix of ethnic elements like hand-carved open book case, painted trunk as center table, cradle-styled chairs, and printed cushions. All the accessories blend well with the bright orange colored walls.

This post outlines an easy DIY project you can do with your kids: how to outline, sketch, and paint a cartoon in canvas.  One of the easiest ways to spruce up your kid’s room is to decorate it around their favorite cartoon characters. My three-year-old is very fond of the Disney character, Winne the Pooh and his buddies Tigger, Christopher Robin, Rabbit, Eeyore, Lumpy, Kanga, Roo and Piglet. But he is at such a age where his liking for the fantasy characters is short-lived. A while ago, he doted on Noddy, and around the second birthday, he was quite crazy about Barbie (if only, for a brief while like two hours during which he felt she wasn’t quite her kind of fun),  and now, it’s Winnie and Spiderman. Winnie has being going steady for nearly a year going by the Pooh accessories we have at home now – wall stickers,…

Are you constantly looking for ideas to spruce up your walls? Adding accessories to a wall, re-painting walls with themes, or hanging murals/artwork are some of the easiest ways to change the look of a room. My parents sent me two boxes of DIY wall art stickers in white and green colors. These are wood-based, primed decal like stickers that can glued on to a wall using any adhesive. I was contemplating where to put them up as the floral leaves would have been a perfect fit for the balcony, the space I love the most, but the hard exterior finish of the walls made it difficult to stick them on. So, I chose a bedroom wall instead.

Hope you all had a good weekend. It was a busy, crafty weekend for us as my three-year-old son and I got into action. I had a set of six wooden coasters that badly needed some revamping. In the past, I’ve tried painting them with acrylic colors but the results were not satisfactory. I was wondering how to give them a face lift when an idea struck me. I noticed the tiny bottle of Modge-Podge lying ignored on the craft supplies rack; I’d picked it up from staples a month ago for another project.

Modge-Podge, and dozens of Femina and other home décor magazines collected over the years was enough to get us rolling and get our hands dirty for the decoupage project. Over the next two hours Sunday afternoon, I flipped through Femina/Elle cutting out interesting words and colorful pictures. Once I had enough, we started sticking them onto the coasters. And, this is what we made –

It reads – “Life’s a journey. Some say you must never look back. Why not?”