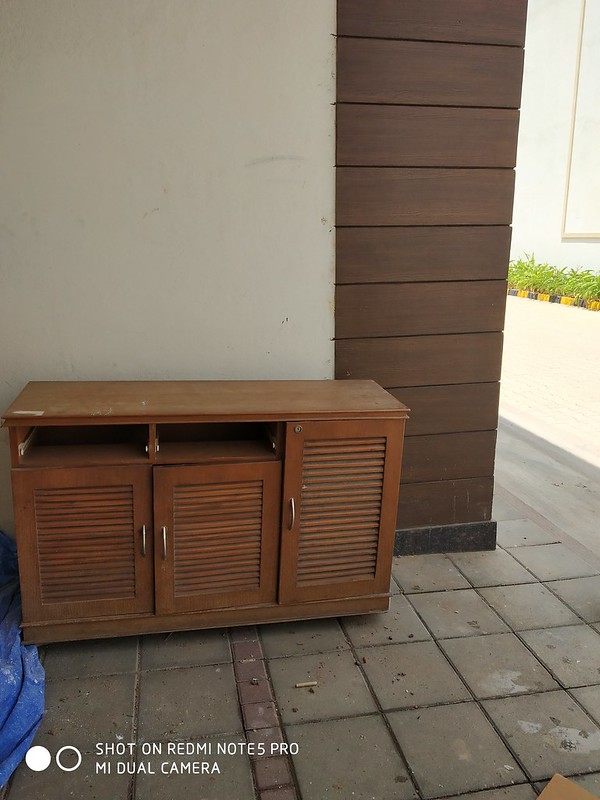
We bought this wooden cabinet as a multipurpose storage unit to store footwear, newspaper, and odd hardware tools. This was one of our first purchases after we moved into our first home. To be honest, I had zero understanding of decorating, interior styling, or what to buy for what. If there was a dire need, we bought that piece of furniture so long it fulfilled its function and our not-so-deep pockets. Form had not entered our lexicon. So, yes, our home was a concoction of disparate elements from tan sofa to geometric tiles. But, you hold some things dear, when they are reminiscent of good ole memories of your first home. So, this piece came with us despite our best efforts to sell it on Quikr. Make no mistake, it got sold two times, and both times it was returned and money refunded to the buyer due to a technical…

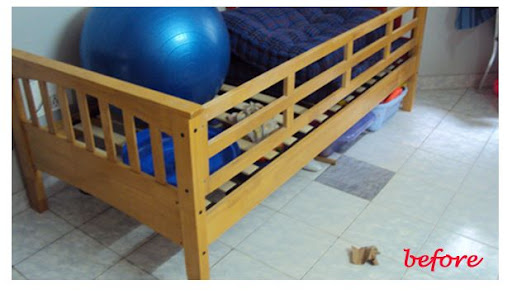
For today’s DIY post, I am reviving one of of the old projects and how it has come handy over the years. Look around your house or take a walk around your apartment, and you can be absolutely sure of finding a piece of wood in good shape. Along with my son’s bunk bed, the carpenter had given two extra strips of rubber wood if we ever wanted to attach a railing on the other side.
So, the mother-son duo got into action. The task at hand was to convert this unused piece of rubber wood into a key/sports equipment hanging rack.
In continuation of yesterday’s post, I’ll describe the process that you can apply to paint any wooden furniture. So, if you’re game for some hard work, let’s get started. Preparation: 1. Identify the piece of furniture you want to paint. And, be convinced why you want to paint. Some pieces of furniture look best in their natural form. For instance, you don’t want a yellow paint over a beautifully carved teak wood cabinet, right? 2. Come up with a color scheme. Do a bit of research and use your design gut to finalize colors. To add zing to bare white walls, brightly painted furniture is a good idea. But if you have a thematic wall, already, adding more color wouldn’t bring the object to focus. In this case, a neutral color would work well. Things you’ll need: Now that we’ve settled on the colors, let’s go do some shopping. I…
One evening last month, while searching for a sofa for our living room, I happened to go to the @ home store in Marathahalli with my son. When we moved from the Living section to the Bedroom section, his eyes caught a colorful red-and-orange colored bunker with a nice set of wheels and ladder. To be honest, even I loved it. He insisted on getting it home, and in the heat of the moment, I promised to paint his bed in the same color scheme. He immediately agreed and we got home. The episode was forgotten. A week passed and I made no effort on keeping my promise (quite unlike me). He gently reminded me one afternoon after returning from school that his bed still had no wheels or, yellow and red color. It was time to get acting. I made a mental note to get the required colors before…
Good afternoon everybody! With the rains making a guest appearance only on Monday, I hope you all had a wonderful weekend. It has been a busy weekend at “dress your home”, in literal sense. I can’t remember the last time we were involved as a family in a rigorous DIY activity. Friday saw me returning home with cans of fresh, bright paint. By Saturday afternoon, we were in our muddy clothes holed up in the kid’s bedroom with newspapers sprawled on the floor and paint brushes in the hand. The job is still far from done, so you will have to wait for pictures :) But, I promise it will be a long post full of pictures with a step-by-step guide (about what? keep guessing!)
Before I started on the BIG project, I hand painted a terracotta pot on Thursday in one of my favorite colors – Turquoise. I love Turquoise because its bright, cheerful and is a head-turner. Don’t you agree? ever since I painted one of the pots in this electric color, it’s taken away the attention from my other pots. It’s picture time now.
This was how it was before I started.
After a night of immersing the pot in a bucket of water, it was ready to be painted the next morning. Earthenware absorb less color when left in water for a few hours.
The pot has a metallic shine to it as I’ve used pearl acrylic colors.
Do we have any diligent readers (read: obsessively checking Google Reader for new posts) of Apartment Therapy here? If yes, you would know that a good chunk of posts are about restoring or transforming old furniture through painting and replacing the hardware. Images of antique, worn wooden cabinet/dresser/table painted into white or turquoise blue are swimming in my head now.
For me, when it comes to home renovation, there is nothing more satisfying than giving a face lift to old furniture. To discard the old and buy new stuff is easy work, don’t you think? There are a few odd pieces of furniture in every house such as a chair, cabinet, side table that look aged. A polish or a new coat of paint will do them good. I want to get started off with a old cabinet first. It’s about six years old and in good working condition. It has lost its sheen so I’m toying with the idea of retaining its natural finish with a coat of lacquer or doing something radical like painting it in a bold color combination of white-lime green or white-turquoise blue.
I’ve been looking around for ideas and there are quite a few interesting ones that I would like to share.
For a ethnic, Indian theme, bright colors such as fuchsia, red or violet are a good choice to complete the look. However, if you have a monochromatic or minimalistic theme, a single of furniture in a dashing color will look out of place. In the picture below, for instance, Kishani Perera has used a good mix of ethnic elements like hand-carved open book case, painted trunk as center table, cradle-styled chairs, and printed cushions. All the accessories blend well with the bright orange colored walls.
Before we get to the wooden collections from Jin Kuramoto Studio, let me tell you how I got there. I have two identical terra cotta pots with an interesting shape waiting to be painted and planted. I got it on my trip to Mahabalipuram; so they’ve been sitting in my balcony for over a month. I can’t settle on a design/color for the pots, and am constantly looking for fresh ideas. While scouting for modern patterns, I discovered materialicious. According to the folks who run the site, “materialicious™ (“shelter, materials and objects”) is a user-submitted visual curation site featuring modern architecture and design, craftsmanship, materials and products.” True to every word. You can’t get your eyes off the page once you start browsing, and before you realise you’ve spent enough time wasting looking at the stunners. Now, materialicious is what led me to Jin Kuramoto Studio. The wooden tea sets…
Designed by Gaurav & Vidhita Kharkar/ IC: Photographix India Design by P& D Associates / IC: Photographix Design by The Yellow Dwelling Design by Tangerine Turfs Design by Design Cafe Design by Aangan Architects Design by The Company of Design Design by Neha and Gaurav Your foyer is an indication of what to expect inside the home. Color or muted interiors, organized or cluttered, storage space, accessories etc. A organized, tastefully decorated foyer generally leads to a equally well-maintained home. If the entryway is disheveled, then your guess is as good as mine as to how rest of the house will be. If you are running out of ideas, then this post will come to your rescue; it outlines how to create an entryway when there is no earmarked space. I’ve always liked having a foyer so that the front door doesn’t open directly into the living room. But, unfortunately,…
Who says your interior doors have to be neutral in color? Tired of the white/ivory color doors? Bright colors need not be restricted to walls, curtains or furniture. Go bold with these three ideas and style your door differently…
Bright paint can make so much of a difference…
I had a set of 6 wooden coasters that were nearly 5 years old. Dull, faded, and ready to be discarded. But the coasters/place mats are the sturdy kind that I didn’t have the heart to just junk it. So over the weekend I transformed a pair (to begin with) into these bright, colorful coasters. How to paint: The steps are similar to how we painted the cane furniture: sanding, priming, painting followed by a coat of varnish. The only difference is I used acrylic paint for this project.


