In continuation of yesterday’s post, I’ll describe the process that you can apply to paint any wooden furniture. So, if you’re game for some hard work, let’s get started. Preparation: 1. Identify the piece of furniture you want to paint. And, be convinced why you want to paint. Some pieces of furniture look best in their natural form. For instance, you don’t want a yellow paint over a beautifully carved teak wood cabinet, right? 2. Come up with a color scheme. Do a bit of research and use your design gut to finalize colors. To add zing to bare white walls, brightly painted furniture is a good idea. But if you have a thematic wall, already, adding more color wouldn’t bring the object to focus. In this case, a neutral color would work well. Things you’ll need: Now that we’ve settled on the colors, let’s go do some shopping. I…
One evening last month, while searching for a sofa for our living room, I happened to go to the @ home store in Marathahalli with my son. When we moved from the Living section to the Bedroom section, his eyes caught a colorful red-and-orange colored bunker with a nice set of wheels and ladder. To be honest, even I loved it. He insisted on getting it home, and in the heat of the moment, I promised to paint his bed in the same color scheme. He immediately agreed and we got home. The episode was forgotten. A week passed and I made no effort on keeping my promise (quite unlike me). He gently reminded me one afternoon after returning from school that his bed still had no wheels or, yellow and red color. It was time to get acting. I made a mental note to get the required colors before…
Do we have any diligent readers (read: obsessively checking Google Reader for new posts) of Apartment Therapy here? If yes, you would know that a good chunk of posts are about restoring or transforming old furniture through painting and replacing the hardware. Images of antique, worn wooden cabinet/dresser/table painted into white or turquoise blue are swimming in my head now.
For me, when it comes to home renovation, there is nothing more satisfying than giving a face lift to old furniture. To discard the old and buy new stuff is easy work, don’t you think? There are a few odd pieces of furniture in every house such as a chair, cabinet, side table that look aged. A polish or a new coat of paint will do them good. I want to get started off with a old cabinet first. It’s about six years old and in good working condition. It has lost its sheen so I’m toying with the idea of retaining its natural finish with a coat of lacquer or doing something radical like painting it in a bold color combination of white-lime green or white-turquoise blue.
I’ve been looking around for ideas and there are quite a few interesting ones that I would like to share.
For a ethnic, Indian theme, bright colors such as fuchsia, red or violet are a good choice to complete the look. However, if you have a monochromatic or minimalistic theme, a single of furniture in a dashing color will look out of place. In the picture below, for instance, Kishani Perera has used a good mix of ethnic elements like hand-carved open book case, painted trunk as center table, cradle-styled chairs, and printed cushions. All the accessories blend well with the bright orange colored walls.
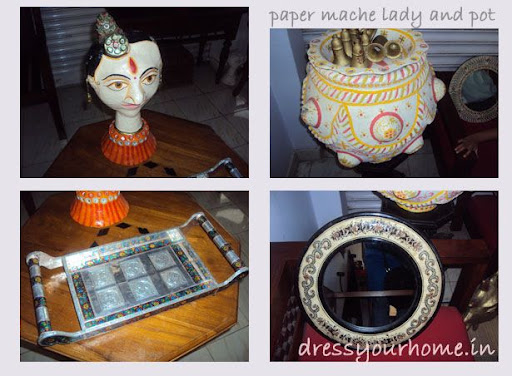
I want to continue where I left off my last post on styling ideas for apartment main doors. The featured shop stcks many hand-crafted, woven assorted items such as baithaks, mirrors, trays and cushion covers.
They are colorful, vibrant and lively almost resonating with positive energy. There is something rustic about them which makes for great accessories.
I loved this wooden, wrought-iron bench. Some day when we have larger garden, this one’s gonna find a place in the patio.
I recently discovered Pinakin while browsing through a magazine, and later did what I do usually – look them up online. I was impressed that they have a better online presence than most Indian furniture and home decor stores. The functional yet great looking furniture speak for themselves. So, I’m going to cut down on the text and let you savor my picks. I loved this alternate seating arrangement, and the stools, in particular. Image Courtesy: Pinakin
I’ve been freelancing (consulting, writing) for the past three years. It’s easy to imagine I would have a fancy workplace in the corner of a room in my apartment that’s tastefully decorated and stocked with all the essentials: magnetic board, post-its, colorful pen stand, clips, file cabinet, and a book rack. In all, a conducive environment that all how-to pieces on having an ideal/productive home office environment talk about. I believe you can guess from the tone the reality is far from that. More often than not, my laptop sits on the dining table; when we have more than 3 people dining at the same time, I make room by shifting to the bedroom. The non-stop activity around the house punctuates my work time: clanking of utensils, my toddler driving his toy-car inside home at crazy speeds, market channel (NDTV profit) running in the background among other things. To be…
Quite an offbeat title for a home decor site, right? Ludo, Snakes and Ladders, and Trade are some of the most commonly found games in any Indian home; the ones we cousins played played on those long afternoons during the summer vacation. I doubt if much has changed now. I stumbled upon the snakes and ladders game in three different settings that were visually stimulating while accentuating the decor.
Aarohi Singh, a Bangalore based artist, creates the age-old game on top of a wooden table. She adds a lot of color to it and what I like about it is its accessibility. One doesn’t need to get the board to start playing; it’s right there on a piece of furniture.
I love bunk beds. But as a child, my brother and I never got to share one. We had those drab, wooden rectangular ones with same-sized head board and foot board for a bed. Lined up against each wall with three foot walking space in between. You get the picture, don’t you? But those were the early 80’s and, in a small town like ours, bunk beds were unheard of.
I relived my dream when I recently went shopping for a functional bunk bed for my two-year-old son. His space-challenged room cannot accommodate another single bed for a sibling in the future. Safety, design, cost, storage, and size figured on my list of priorities, in the same order. It didn’t take long to realize that design and cost didn’t go well together. Most beds I liked were too big and upwards of Rs. 40,000. Though a Noddy themed or Formula 1 themed bed sounded cool for his age now, I was pretty sure he would find it a bit awkward to sleep in one as a 5 year old or feel really uncool to call his friends over to his room.
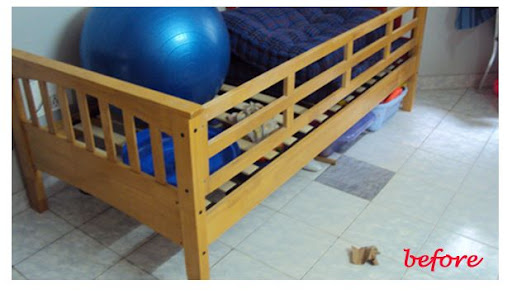
I had almost made up my mind to get one made when I came across this at a store nearby for Rs.15,000. The frame is made of rubber wood. In most bunk beds, the lower half does not have a protective barricade as it is assumed kids old enough to keep themselves within the bed sleep down. It was so not to be in my case. I wanted a protective barrier which no store was ready to customize. This one agreed to and I got the piece finally for Rs. 16,000. The bed measures 3 feet in width and 6.25 feet in length.
What I liked: Can be assembled using a single Allen key. Completely detachable.
What I didn’t like: No storage. Plain design. I plan to jazz it up a bit by painting Noddy characters on the headboard and foot board. A DIY project is waiting to take off…
This post is a roundup of some nice beds I came across in Bangalore, India. Next week, I intend to feature some great designs from around the world if you intend to have your carpenter make one.

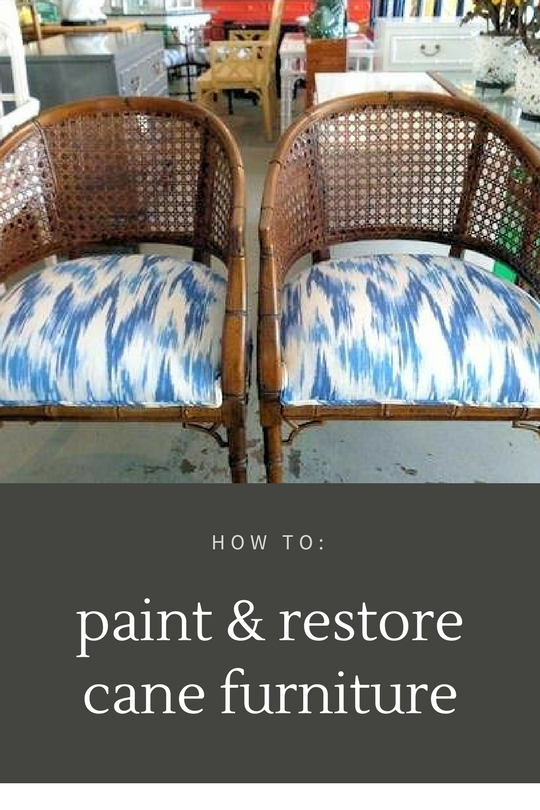
Do you have a set of cane chairs that has lost its sheen and natural color? Wondering if you should give it a new lease of life or just give it away to somebody? In this post, I show you how I painted a set of chairs and the cost of the project.
I had a cane furniture set comprising 4 chairs + 1 table + 2 side tables that were over 5 years old. One look at them and you’ll know they had seen better days. During a recent moving exercise from a BIG house to a smaller apartment, I gave away 2 chairs, the center table and the side tables. However, I retained 2 chairs for use as balcony furniture in the new place. One day while scouting the net, I was inspired to give these chairs a new look.
You have two choices while restoring old cane furniture: giving it a polished look while retaining the natural color or painting it in a different color to complement the surroundings.


